There comes a time were even I run out of things in my pantry, and have to make whats known in my house, as a throw together dinner.
So, I had some leftover Wholemeal Pizza Dough, and some leftover Pesto, and came up with this beauty of a meal.
Take a pantry and fridge worth of leftovers, and create this wonderful pizza with it. Mmmmmmm Pesto.
There comes a time were even I run out of things in my pantry, and have to make whats known in my house, as a throw together dinner.
So, I had some leftover Wholemeal Pizza Dough, and some leftover Pesto, and came up with this beauty of a meal.
Pasties, made by leftovers, pure in taste. Greggs will be delighted.
So the Cornish Pasty has been around for many a year, made famous by the Cornish miners and their soot covered bellies.
Now, I don’t tend to stick to a traditional recipe, simply because it’s a leftover dish for me.
Continue reading “Leftover Pasties”
A mistake in the kitchen leads to a culinary surprise. Whole Wheat Pizza Base.
Aah pizza. I eat it at least one a week, it doesn’t matter what’s on it.
Imagine my surprise when I went to make it last night, and I only had half of the strong white flour I needed.
Continue reading “Wholemeal Pizza Base”
The first pizza I ever tried, and it still holds a special place in my heart.
You know, I have been waiting to do this recipe for a while, because I very rarely make these, but yet eat a lot of them when I am out in restaurants.
Take lunch time sandwiches to a new level with my Hogies!
Sandwiches have always held a love hate relationship with me, considering the bread ends up being bland.
Join me on the road-trip through culinary Seattle, with the meal that defined my trip, given the FatLad treatment of course!
Recently, myself and my lovely lady went to Seattle to holiday, and visit her Aunt and Uncle.
Triple D gives me a tasty treat when using leftover Foccaccia!!
I must admit that I am not afraid to spend a lot of my time watching Cookery shows.
One of my favourites is Diners, Drive ins & Dives, which is were I first saw this, deep dish pizza on display.
So I give you my version, the FatLad Foccacia Pizza!
Foccacia
450g Strong Flour
7g Yeast
1tsp Salt
1tsp Sugar
3tbsp Olive Oil
300ml Water
Tomato Sauce
1 Tin of Tomatoes
1tsp Onion Powder
1tsp Garlic Powder
1tsp Basil
1tbsp Balsamic Vinegar
For the Pizza
Salami slices
Pepperoni Slices
1/2 Mozzarella Ball
1tsp Oregano
1tsp Chili Flakes
1. Following my Garlic Foccacia recipe, make the bread as instructed, using oil and rosemary, instead of the garlic butter.
Once baked, allow it to cool down.

2. Put all of the tomato sauce ingredients into a liquidiser, and blitz until the sauce is completely mixed.

3. Cut the Foccacia in half.

4. Cover in the tomato sauce.

5. Cover in the sliced meats.

6. Cut the mozzarella up and drape over the Pizza.

7. Put in the oven and cook for 15mins.
Enjoy with some garlic bread or some BBQ sauce on the side.

Corned Beef is a staple in my sandwich making artillery, this one is the real deal, created completely from scratch.
Recently, I have become very interested in the method of brining meat, in order to make it as juicy as possible.
The reason I choose corned beef, is because it was staple in our household when I was growing up.
Whether it was in sandwiches, mixed into mash or simply served with peas and gravy, it was a much loved treat.
This one takes a while to make, but it is definitely worth it.
1. Put everything but the brisket into a large pan. Boil until the salt and sugar disappear.

2. Take the brine off the heat and leave to cool completely.
The brine must be very cool, before it hits the meat.
3. Cut the brisket up into pieces, and put them in a container that can be covered.
4. Cover entirely with the brine. It must be completely covered for this to work.
5. Put the lid on, then put in the fridge for 5 days. Yes, it does take that long, so get ahead of yourself. Turn the meat over once every single day.
Now we wait…

6. Chop up some Carrots, celery and onions and add to a large saucepan.
7. Put in the brisket, once you have rinsed off the brine.

8. Cover with water, and bring to the boil.
9. Simmer for 2 hours.
Now its done, pull apart or slice to your liking. Don’t worry if it isn’t red, like corned beef usually is.

That’s because we used sea salt instead of pink pickling salt. The outcome is the same no matter how you cook it.
Loads of new recipes coming soon to use this bad boy!
Dinner, dinner, dinner, dinner, dinner, dinner, dinner, Batman!
It’s Christmas,and everyones favourite super hero has made it onto Santa’s Plate!
Making your own sweet mince is exceptionally easy to be honest, you just need to go through the stages, plus it keeps for as long as the raisins do! Put alcohol in it as I have, and it’ll keep for years!
Ingredients
Make the Sweet Mince
1. Soak the raisins and sultanas in the rum overnight
2. Once done, put in a mixing bowl having drained any juice.
3. Add in the zest, spices and nuts.

4. Add in the syrup, ensuring it is mixed fully.

Make the Pastry
1. Mix the flour & sugar together, and then begin to rub the butter through the mixture.
2. When it resembles breadcrumbs, mix through the orange zest.
3. Add 2 tbsp of water and bring together. Continue to add water until all of the flour is combined into one dough ball.
4. Flatten, cling film and put in the fridge for one hour to set up.
Make the Pies
Preheat your oven to 180C
1. After an hour roll the pastry out until the thickness of a pound coin.
2. Get your cupcake tin greased and floured. Get a cutter and begin cutting out discs of pastry. Put them into each cupcake hole until you fill your tray.

3. Fill each one up with the sweet mince meat.

4. With the remainder of the pastry, cut out novelty shapes with a novelty cutter. Mine just happens to be the Batman sign.

5. Put one on the top of each pie. Egg wash the top and sprinkle with sugar.
6. Bake in the oven for 20-30mins, or until golden brown.

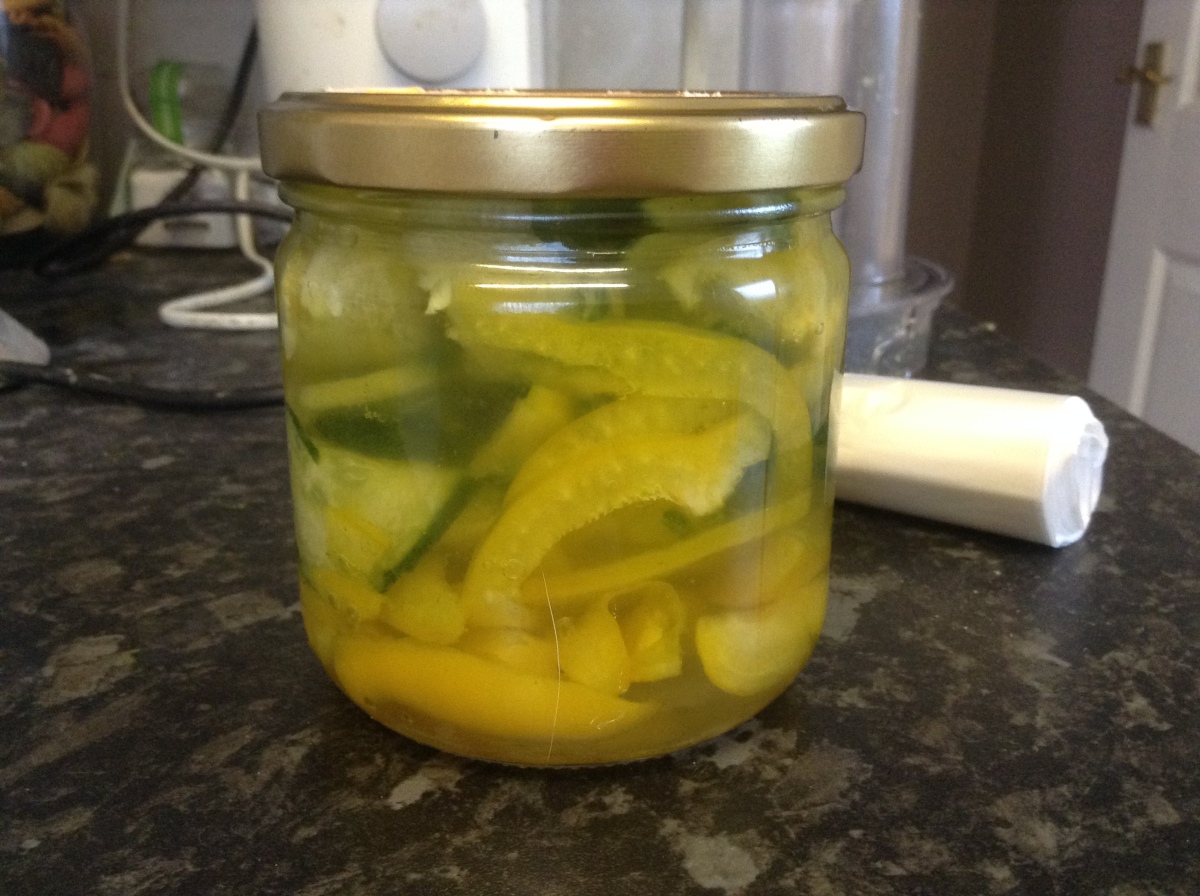
Making fridge pickles is a very easy and satisfying pass time, as it ensures there is no waste in the vegetable box!
It has only been a recent event that Pickles have become somewhat important to me when creating burgers or sandwiches.
I suppose I didn’t really understand how important they were, adding that little bit of bite my bored tastebuds needed.
Cucumbers as well, not my favourite thing, yet I love them when they are pickled. So here is how to create a quick fridge pickle to be proud of.
Whilst I have specified a measurement in Cups for the vinegar, sugar and water, it doesn’t really matter.
What matters is that they all equal the same volume, so it could be a spoon or a jar.
1. Put the vinegar, water and sugar into a saucepan, and place on a low heat. Bring up to simmer, and do so for 15mins, ensuring the sugar is fully dissolved.

2. Chop the cucumber and peppers into fine slithers. I use the food processor for this, its much easier.

3. Sterilise the jar you will be holding the pickle in, drying it thoroughly.
4. Add the vegetables into the jar, until it comes to the top.

5. Pour in the pickling juice from the saucepan, ensuring it comes to the top of the jar also.
6. Leave it to cool completely before putting the lid on.

Put it in the fridge for 48 jours in order the vegetables to pickle correctly. Enjoy with a sandwich or a burger!